

Elevate Your Product Development with Precision Prototyping by FMS
Prototyping is a critical milestone in modern product development and mold manufacturing. While 3D printing continues to evolve, traditional rapid prototyping remains irreplaceable for verifying toolability, tolerances, and real-world manufacturability.
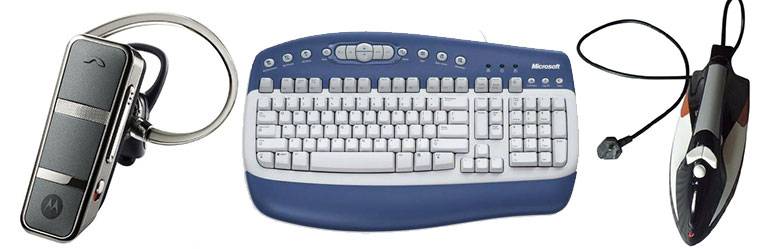 At FMS, we bridge the gap between design and production. We deliver cost-effective, high-precision prototyping services tailored for your new products and molds. Our commitment is simple: uncompromised quality, professional efficiency, and transparent collaboration.Our Core Capabilities:
• Design & Modeling: Conceptual models and fully detailed 3D component modeling.
• Advanced Rapid Prototyping: High-fidelity SLA, SLS (Selective Laser Sintering), and FDM 3D printing.
• Fit & Function Analysis: Engineering-grade prototypes to test form, fit, and operational performance before mass production.
Partner with FMS to accelerate your time-to-market without compromising your budget.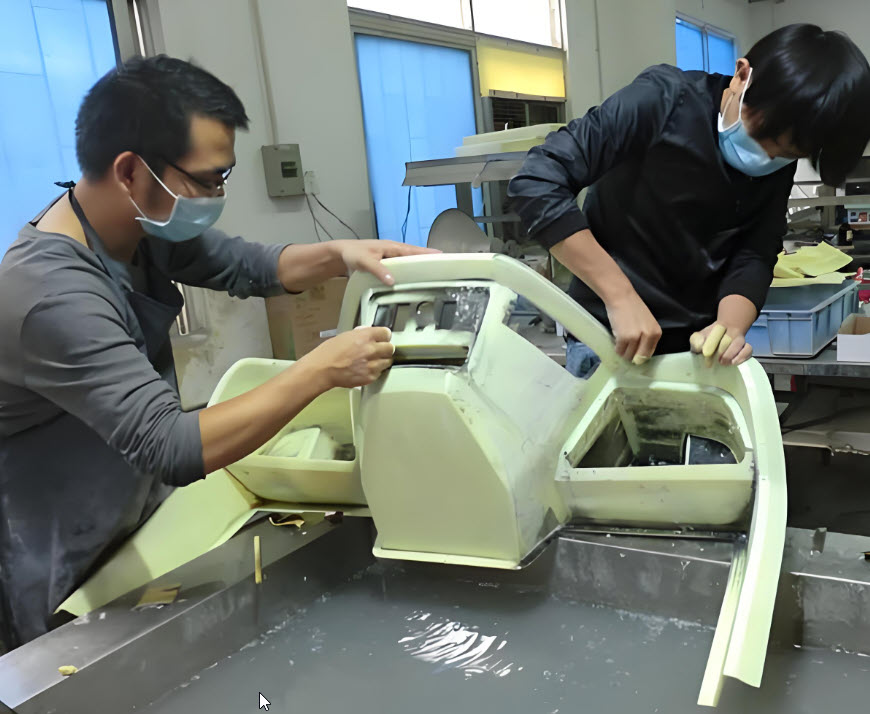
Transforming Vision into Reality: Advanced Prototype Manufacturing
Prototype manufacturing is the critical bridge between digital industrial design and market success. By transforming complex 3D CAD models into functional, tangible products, we enable real-world testing, immediate assessment, and flawless design validation long before mass production begins.
Utilizing a seamlessly integrated ecosystem—combining cutting-edge CNC machining, laser technology, automated CAD/CAM workflows, and advanced materials—we deliver a comprehensive from-part-to-prototype solution. Today, as we harness the full potential of next-generation 3D printing and additive manufacturing, we aren’t just adapting to industrial evolution; we are actively accelerating your product R&D and redefining what’s possible in making.
Industrial-Grade 3D Printing & Additive Manufacturing Services
Accelerate your product development and scale production with our end-to-end 3D printing services. We partner with designers and engineers worldwide to deliver high-performance prototypes, custom tooling, manufacturing aids, and flight-ready or end-use parts.
Leveraging state-of-the-art additive manufacturing technologies and deep material expertise, our team meets the most stringent industry standards—delivering exceptional precision, cost-efficiency, and fast turnaround times. No matter the complexity, we provide the technical expertise to bring your designs to life.
How It Works:
1. Submit Your Design: Upload your 3D CAD models via email for a secure project review.
2. Select Materials: Choose from a wide range of high-performance polymers, resins, or metals.
3. Precision Manufacturing: Our experts optimize and print your parts using advanced additive systems.
4. Quality Inspection & Delivery: Receive production-grade parts, thoroughly inspected and shipped directly to your facility.
3D Printing Service Technologies:
 1) SLA
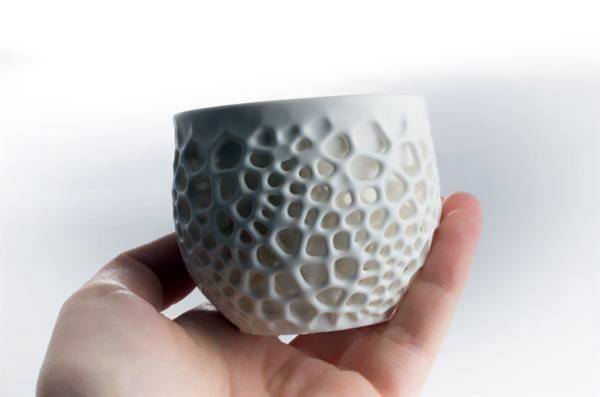
Stereolithography (also known as SL or SLA) builds parts layer-by-layer using a UV laser to solidify liquid photopolymer resins. It is commonly used to produce concept models, master patterns, large prototypes and investment casting patterns.
Advantages
SLA is a good general-purpose additive process for a wide range of applications. Models and prototypes are rigid, strong and durable
2) Multi Jet Fusion (MJF)
Multi Jet Fusion is a durable technology which produces medium-quality surface finish, which is ideal for high-complexity with medium accuracy and can be used for short production runs.
Advantages
MJF is ideal for enclosures, electronics housings, ducts, lattice structures, and functional assemblies. Suitable for applications that require durability such as snap fits.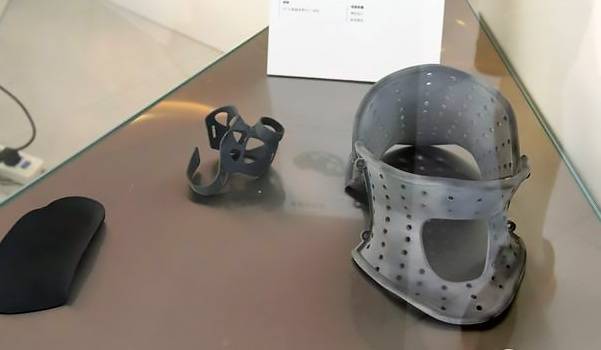
3) PolyJet
The PolyJet rapid prototyping process uses high resolution ink-jet technology combined with UV curable materials to quickly and economically produce highly detailed and accurate physical prototypes.
Advantages
High accuracy, superior surface finish, and wide selection of rigid and soft (rubber-like) materials to choose from. Build multiple materials and colours in a single part.
4) FDM
Fused Deposition Modeling (FDM) creates parts layer-by-layer with engineering-grade thermoplastics. Ideal for functional parts, including prototypes, low-volume production, manufacturing aids, jigs and fixtures.
Advantages
The FDM process uses the same types of raw materials used in the injection molding process. This technology includes use of support material to create create complex parts and assemblies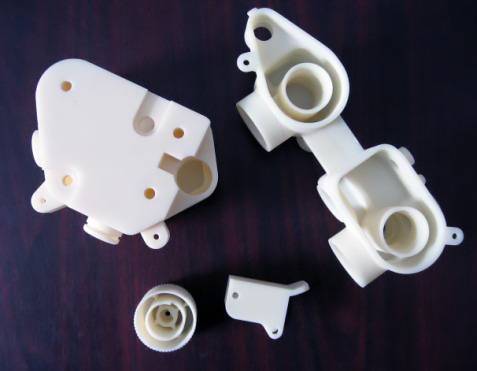
5) DMLS / Metal
Direct Metal Laser Sintering (DMLS) fuses powdered metal and alloy materials to produce metal parts. DMLS produces fully realized metal parts, including tools and end-use parts for a variety of industries.
Advantages
Metal 3D printing, with its advanced metals offering, is best utilized in highly complex and involved design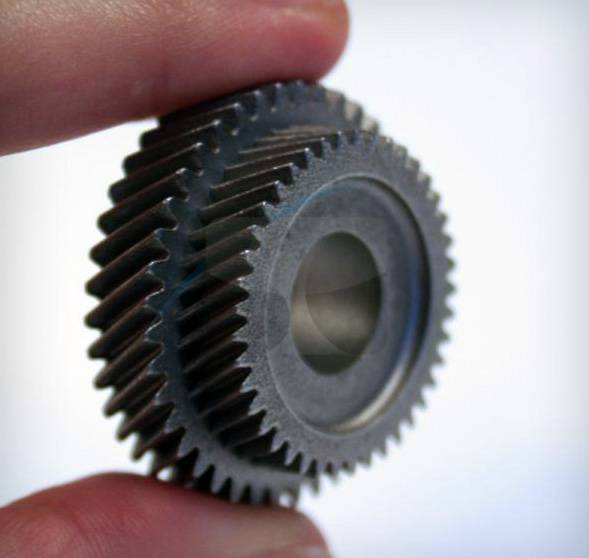
6) LS / SLS
Laser Sintering (LS) (also known as Selective Laser Sintering or SLS) uses a CO2 laser to heat and fuse durable
thermoplastic powder to build versatile parts with high elongation at break.
Advantages
LS production parts and prototypes provide lightweight, heat and chemical resistant solutions. SLS constructs 3D-printed parts from nylon (polyamide), which is strong, tough and durable
Material selection for 3D printing:
3D printed materials are very rich, including transparent, rubbery and biocompatible photopolymers, as well as tough, high performance thermoplastics and more. From fast, inexpensive concept modeling to detailed, super-realistic functional prototyping, through certification testing to agile, low-risk production, our team will help your designers and engineers solve material choice questions and make you design is successful at every stage. the following guides will help you select the perfect material based on a few important factors, like type, minimum thickness, texture and the all-important cost:
NYLON: (Polyamide)
Also called White, strong & flexible / Durable plastic / White plastic
Strong and flexible plastic, 1mm minimum wall thickness, Naturally white, but you can get it colored, About 10 layers per 1mm, Made from powder, Alumide = Polyamide + Aluminum, Interlocking, moving parts possible (chain)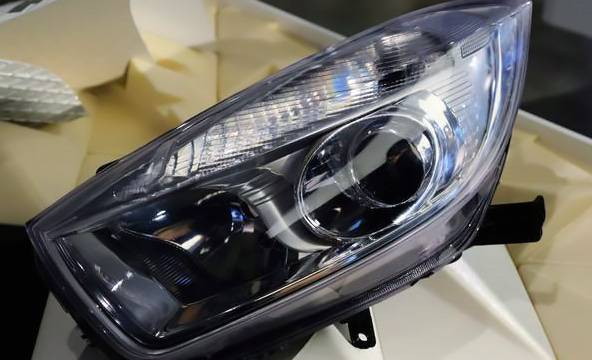
ABS: (Home printers)
Strong plastic like legos are, Made from spaghetti like filament, Many color options, About 3 layers per 1mm, 1mm minimum wall thickness
RESIN: (Multiple options)
Also called White-, Black-, Transparent detail / White detail resin / High detail-, Transparent-, Paintable Resin
Rigid and a bit delicate, Liquid Photopolymer cured with UV light, White, black & transparent most typical colors, About 10 layers per 1mm, 1mm minimum wall thickness
STAINLESS STEEL:
Very strong material
Made with multiple steps or from powder directly, Coloring options like gold and bronze plating, About 6 layers per 1mm
3mm minimum wall thickness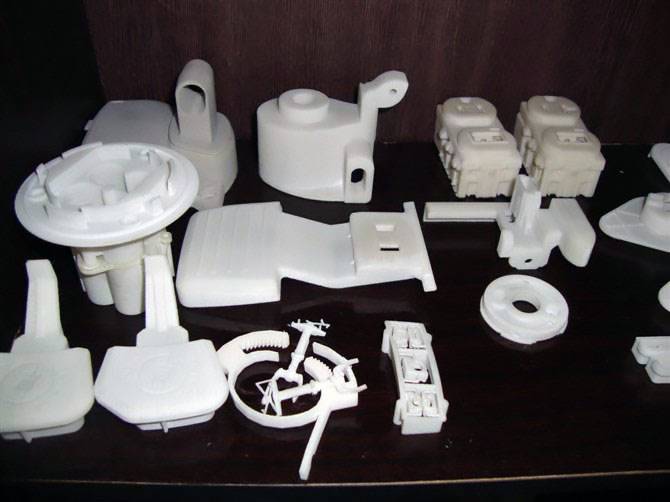
GOLD & SILVER:
Strong materials
Made from wax and then casted, About 10 layers per 1mm, 0.5mm minimum wall thickness
TITANIUM:
Strongest material
Direct metal laser sintering, About 30 layers per 1mm, 0.2mm minimum wall thickness
CERAMIC:
Rigid & delicate
First ceramic is printed then surface is glazed, Ceramic white, glaze typically white, About 6 layers per 1mm, 3mm minimum wall thickness
GYPSUM:
Also called Sandstone / Rainbow ceramics / Multicolor
Rigid & delicateMade from powder, Naturally white, but you can get it with colors, About 10 layers per 1mm, 2mm minimum wall thickness
Using CAD software and a 3D printer, rapid prototyping can be taken to new heights. 3D printing is one of the most common prototyping methods today, simply due to its major benefits.
On the one hand, one of the largest benefits of using 3D printing for prototyping is its ability to save time and money. It does so, avoiding paying an external manufacturer for every iteration and design. Moreover, 3D printing allows designers to save the waiting time until they see a functional prototype. As a result, they can quickly make changes on the spot.
Depending on the print job, a design can be printed in a matter of minutes or hours. For particularly large models, leaving the 3D printer on overnight is the best option. It allows you to come back to the office to a fully printed prototype, freeing up space for the next one.
Furthermore, rapid prototyping allows designers to keep their concepts in-house. Therefore, not only speeds up the workflow, but it keeps ideas confidential and secure.
On the other hand, the most valuable role of 3D rapid prototyping is the ability to test and compare different models or design ideas. This applies when testing both functionality and aesthetics.
We recommend using a more durable filament like PA and TPU or a similar filament to your end-use material. This way, you can test if your design will stand up to important elements or factors, such as certain chemicals or the weather. Similarly, 3D prototyping allows you to physically compare different visual concepts and iterations.
Developing a Prototype: Step by Step
First, find products that are similar to your design. Take them apart to get an insider perspective on their function.
Using paper, draw what your idea will look like. Write or type out any additional ideas. This will give you an idea of what the first prototype will be like and will help you find flaws and other ways to improve the product’s design before you spend the time, effort, and money to build a prototype.
Hire a professional to assist you in developing a computer-aided design (CAD) of your prototype. This design will be much more detailed than your sketch and will be sent to the prototype maker to enable them to make the most detailed and accurate prototype possible.
If possible, create a handmade version of your product. Having a sample in-hand will make it much easier to discuss your parameters and ideas with the prototype maker. In addition, it will allow you to further refine your idea.
Find a prototype maker that will fit your budget. Oftentimes, making a prototype can be somewhat expensive. Decide which material you’ll use for your prototype. Prototype materials should be the same materials that you intend to use in the final product.
As you meet with prototype-making companies, inquire about their credentials and previous work to make sure that your prototype will be high quality and accurately represent your design. Regardless of whether the company has worked cooperatively with its clients in the past, obtain a nondisclosure agreement from them, unless you’ve already acquired a patent.
Consider creating a prototype with 3D printing. These printers can use CAD designs or 3D models to build a working prototype, layer by layer.
Raise funds by getting in touch with your family and friends first. You may still need to approach other sources to turn production into a reality. Investors may be especially useful during this stage.
Fulfill your customers’ orders and produce as much of your product as you can sell. Constructing a prototype can be an expensive process, so make sure to avoid getting stuck with a large inventory. As you sell your product, you’ll need to improve upon the initial design until it becomes a profitable and attractive.
Tips for Developing a Prototype
Hire a professional who is skilled at using drafting software, including CAD and its variants. Examine the design on a 3D plane and make sure the connections, angles, and balance are mathematically sound.
Don’t forget that the fewer parts a product has the better. When creating an electronic prototype, avoid redundant and ugly connections. If you’re creating a physical (non-technology-related) product, keep aesthetics and product simplicity in mind.
If you’re creating a tech product, create a list of all the necessary components. Make sure the connections and wiring are checked by a professional in the field.
Using your CAD design, make a nonfunctional, physical mock-up. Use wood, cardboard, foam, plastic, or whatever materials are similar to your intended product. While the process may be frustrating and time-consuming, it will allow you to become familiar with the physical feel of your design.
Your first prototype may not look very attractive or professional. Don’t get discouraged. Instead, check its functionality. If all works properly, then you’ll just need to refine and revise the aesthetics.
As you present the prototype to investors, include a printed and detailed guide on its assembly. Investors will find it valuable to be able to see the interior and inner workings of the product. Present both an assembled prototype and a disassembled prototype when showing your design.
You might even decide to present your prototype to your customers in order to gain feedback and suggestions. Of course, if you decide to run these tests, the judgment ultimately lies with you.
If you’re here, you likely already have an idea for a product. This might be a simple sketch on the back of a napkin, a 3D render, or even a fully-fleshed out proof of concept.
Your next step is to turn this rough idea into a functional prototype. We’ll share a process to create your own prototype below:
1. Create a detailed diagram or sketch
The first step in creating a prototype is to create a detailed concept sketch or diagram. Your objective should be to capture as many ideas as possible in a visual manner.
Ideally, you should have two concept sketches:
A design sketch showing how the product might appear upon completion
A technical sketch showing the product’s dimensions, materials, and working.
You can use software to do this, but pen and paper work better. You can even turn to these pen and paper drawings when you’re filing a patent. Feel free to experiment and be creative in this step. You’re a long way from manufacturing at this point; don’t be afraid to try new things.
2. Create a 3D model (optional)
The next (optional) step is to transfer your concept sketches to a 3D modeling software. This will help you (and any third-parties such as investors or partners) visualize the product better. You can also use this model to create a 3D printed copy of your prototype.
Another benefit of a 3D model is that you can use augmented reality apps to visualize it in the real world. This works particularly well to demonstrate the size, shape, and design of a product idea. It can be expensive for a small business that hasn’t launched yet, though.
There are a number of tools you can use to create simple 3D models.
3. Create a “proof of concept”
Now comes the fun part: actually building the product idea.
How you build your first proof of concept will depend on a number of things. If you have a simple product that you’ve already modeled in a 3D software, you can simply get it 3D printed to create your “proof of concept”.
However, if you have a complex product with a number of mechanical or electronic parts, you’ll have to improvise harder.
Remember that the proof of concept doesn’t have to look good or even resemble the final product. It simply has to work. You can even use common household products to create this early-stage model.
For more complex products, you might have to seek help from a handyman or machinist.
4. Create your first prototype
Your proof of concept shows that your product works. Your 3D model shows what it might look like.
Your next step is to combine the learnings from the proof of concept and 3D model to create your first prototype.
This should be a fairly detailed model that looks like your final product and has the same functions.
It’s not always possible to create this detailed first prototype alone. Depending on the complexity, you might want to get help from a machinist or a specialized prototype designer.
5. Create a production-ready prototype
The final step before you get to manufacturing is to trim the fat off your first prototype and get it to the production-ready state.
This is essentially a process of cost and feasibility analysis. You have to go through every part of the prototype and figure out ways to cut costs without compromising functionality.
At the same time, you should look at ways to improve the product’s aesthetics or durability.
For example, you might replace an oft-used plastic part with metal, and a little-used metal part with plastic. This will help you cut costs while still retaining quality.
It helps to work with a manufacturer and figure out how different components in the prototype might impact its cost and quality. You should also look at different raw materials and see which ones are more pleasing aesthetically.
Your goal should be to find a balance between cost and quality depending on your target customers. If you’re targeting luxury buyers, for example, quality will be more important than cost. For budget customers, it will be the opposite.
When the technology was first developed, 3D printing was so synonymous with rapid prototyping that the two terms were interchangeable. Whether referencing “3D printing,” “rapid prototyping,” or “RP,” the conversation generally all referred to the same thing. Today, 3D printing has developed into end-use production capabilities as well and is more commonly synonymous with “additive manufacturing.”
Still, rapid prototyping was the first and remains the largest application for 3D printing. Iterations from proof-of-concept through to functional prototype can all be 3D printed. Whether outsourced or in-house, using 3D printers speeds up the rapid prototyping significantly through removing traditional bottlenecks in tooling and/or shipping. Rapid prototyping can also increasingly be done using the same 3D printing technology as will be used for the final product.
One of the biggest challenges in creating a prototype is balancing utility and cost. You want the product to fulfill its promised functions, but you also want to sell it at a reasonable price. An exceptional product that your customers can’t afford is bound to fail.
At every stage in the design process, ask yourself two questions:
Is this part necessary?
If yes, what is the cheapest material to make it without sacrificing utility?
The cost of materials varies widely, even among materials in the same category (such as “plastic” or “metal”). Keep this in mind when you’re designing your product.
Another reason for cost overruns between prototype to final product is the use of custom manufacturing techniques.
Essentially, any factory that builds your product will use some industry standard manufacturing processes (such as “injection moulding”). If your product can’t be manufactured using them, the factory will have to create customized techniques and train its staff to use them.
This can add substantially to the production cost, especially if you’re manufacturing in small batches.
Therefore, when you’re designing your prototype, keep a close eye on the kind of manufacturing process each part will require. If a feature requires a heavily customized production technique, consider removing it. A prototype designer or machinist should be able to help you figure this out.
Related: What Your Business Plan Should Look Like: Sample
Taking apart your competitors’ products can give you a detailed understanding of what works, what doesn’t when making a product. This can be a massive help in designing your own idea.
Therefore, before you start creating your prototype, take a close look at your competitors’ products. Analyze their materials, design, and manufacturing techniques. Look for flaws and opportunities.
Testing a prototype is an essential part of creating a product. It’ll help you identify weak spots in your prototype and avoid going over a budget: it’s cheaper to fix a prototype than a final product. Not to mention, you’ll get valuable insights from real people and improve your product to avoid negative feedback after you launch it.
To me, prototypes are VERY rough. I wouldn’t expect either the assets or the code to be shippable or consumer facing at all. In that sense, the protoype you build will probably just be used to convey your idea. If you’re using the prototype just to help sell your idea, then you should be fine.
If you consider the prototype to be something shippable, then yes, you definitely need to either get permission, license, beg, bribe, etc. to make sure you’re covered for your intent to sell.
Will 3D Printing Ever Replace traditional Prototyping? It’s a fair question when you consider how quickly it has already revolutionized the industry.
Potentially, many, many years from now 3D printing will expand to replace traditional manufacturing as we know it today. However, this is not likely something we will see in our lifetimes. In the near future, 3D printing could potentially significantly modify some processes within the industry.
Rather than seeing 3D printing as a potential ender of manufacturing as we know it, we see 3D printing as a way to expand the field of manufacturing beyond what we can currently even imagine.
Whether you’re a small business owner or part of an international conglomerate, it’s wise to include a design prototype in your business plan. Here’s why:
A prototype will help you understand the user experience. When you have a physical product in hand, you can comprehend the prototype design in a way that isn’t possible if it’s just a theoretical idea written out in an inventor’s journal.
A prototype facilitates market research. When you present a potential consumer with a visual prototype or place a physical object in their hands, you can use their reactions to glean information about your target audience.
A prototype improves your final design. Remember that your prototype is just a passing stage in the overall production process. To reach the next level of success, you’ll need to identify flaws in the prototype, and put in some hard work to remedy those flaws.
A prototype can spark other invention ideas. Let’s say you’re working on a prototype for a remote control car, and in the testing process you realize the car should be controlled by a mobile app. Suddenly, you have to hire iOS and Android coders, but more importantly, you’ve identified an additional product that should exist.
Creating prototypes isn’t difficult and here are some general steps involved in the prototyping process:
Define your requirements
The first step of prototyping is to define your goals – why do you need a prototype? What are you trying to solve?
Ideation
Once you have your goals, jump in and create as many prototyping ideas, don’t get bogged down in this step, as these ideas will help jog your mind to think outside the box no matter how silly they may be, it’s always an important process.
Build your prototype
In this phase, you will design an actual prototype based on the information gathered from the quick designs. This will be a small working model of your requirements.
User testing
Once you’ve created a prototype, you’ll need to put it in front of users. You’ll want to observe how they interact with the product in its current state and ask for feedback on the experience. By continuously prototyping, you’ll be able to make informed design decisions that will help you iterate your way to an intuitive and user-friendly product that users will love.
Refining prototype
Based on the user’s feedback and suggestions, this will be the stage to refine your prototype. This phase won’t be over until all the requirements you specified at the beginning of this process have been met and the user is happy with the results.
Practical tips that work for any prototype
First and foremost, all prototypes should be catered to the audience they’re being made for—this ensures relevant, actionable results.
Whoever the audience is should also be primed, prepared, and given background knowledge to avoid confusion. It is important to involve them in the design process. After all, user feedback is the lifeblood of any successful prototype.