

Elevate Your Product Development with Precision Prototyping by FMS
Prototyping is a critical milestone in modern product development and mold manufacturing. While 3D printing continues to evolve, traditional rapid prototyping remains irreplaceable for verifying toolability, tolerances, and real-world manufacturability.
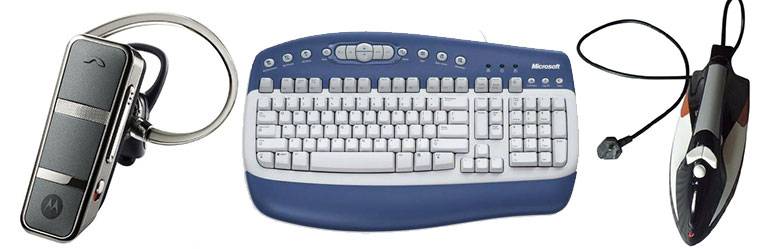 At FMS, we bridge the gap between design and production. We deliver cost-effective, high-precision prototyping services tailored for your new products and molds. Our commitment is simple: uncompromised quality, professional efficiency, and transparent collaboration.Our Core Capabilities:
• Design & Modeling: Conceptual models and fully detailed 3D component modeling.
• Advanced Rapid Prototyping: High-fidelity SLA, SLS (Selective Laser Sintering), and FDM 3D printing.
• Fit & Function Analysis: Engineering-grade prototypes to test form, fit, and operational performance before mass production.
Partner with FMS to accelerate your time-to-market without compromising your budget.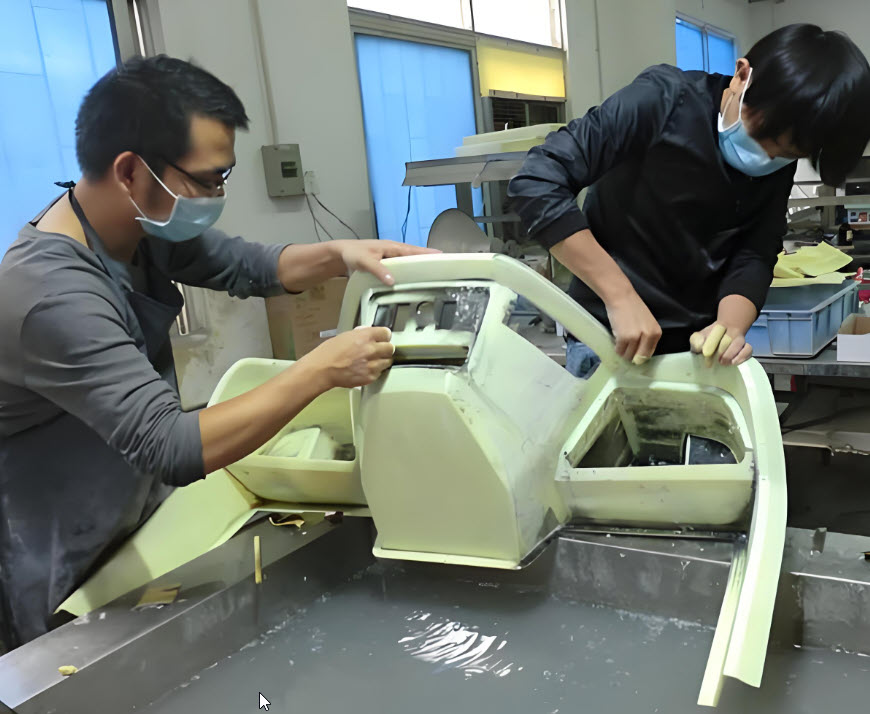
Transforming Vision into Reality: Advanced Prototype Manufacturing
Prototype manufacturing is the critical bridge between digital industrial design and market success. By transforming complex 3D CAD models into functional, tangible products, we enable real-world testing, immediate assessment, and flawless design validation long before mass production begins.
Utilizing a seamlessly integrated ecosystem—combining cutting-edge CNC machining, laser technology, automated CAD/CAM workflows, and advanced materials—we deliver a comprehensive from-part-to-prototype solution. Today, as we harness the full potential of next-generation 3D printing and additive manufacturing, we aren’t just adapting to industrial evolution; we are actively accelerating your product R&D and redefining what’s possible in making.
Industrial-Grade 3D Printing & Additive Manufacturing Services
Accelerate your product development and scale production with our end-to-end 3D printing services. We partner with designers and engineers worldwide to deliver high-performance prototypes, custom tooling, manufacturing aids, and flight-ready or end-use parts.
Leveraging state-of-the-art additive manufacturing technologies and deep material expertise, our team meets the most stringent industry standards—delivering exceptional precision, cost-efficiency, and fast turnaround times. No matter the complexity, we provide the technical expertise to bring your designs to life.
How It Works:
1. Submit Your Design: Upload your 3D CAD models via email for a secure project review.
2. Select Materials: Choose from a wide range of high-performance polymers, resins, or metals.
3. Precision Manufacturing: Our experts optimize and print your parts using advanced additive systems.
4. Quality Inspection & Delivery: Receive production-grade parts, thoroughly inspected and shipped directly to your facility.
3D Printing Service Technologies:
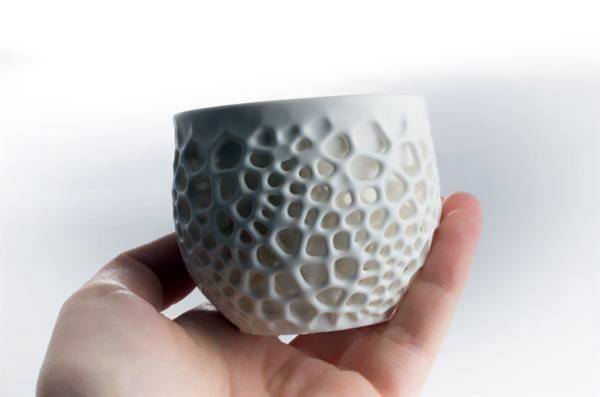 1) SLA
Stereolithography (also known as SL or SLA) builds parts layer-by-layer using a UV laser to solidify liquid photopolymer resins. It is commonly used to produce concept models, master patterns, large prototypes and investment casting patterns.
Advantages
SLA is a good general-purpose additive process for a wide range of applications. Models and prototypes are rigid, strong and durable
2) Multi Jet Fusion (MJF)
Multi Jet Fusion is a durable technology which produces medium-quality surface finish, which is ideal for high-complexity with medium accuracy and can be used for short production runs.
Advantages
MJF is ideal for enclosures, electronics housings, ducts, lattice structures, and functional assemblies. Suitable for applications that require durability such as snap fits.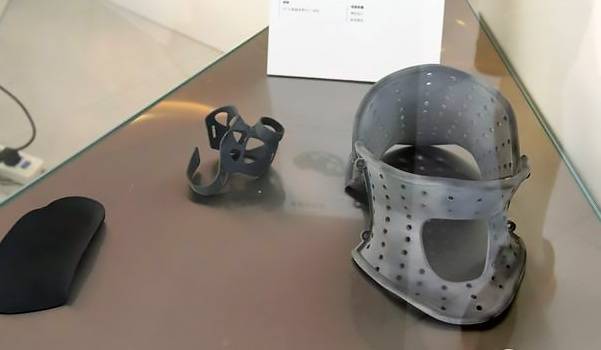
3) PolyJet
The PolyJet rapid prototyping process uses high resolution ink-jet technology combined with UV curable materials to quickly and economically produce highly detailed and accurate physical prototypes.
Advantages
High accuracy, superior surface finish, and wide selection of rigid and soft (rubber-like) materials to choose from. Build multiple materials and colours in a single part.
4) FDM
Fused Deposition Modeling (FDM) creates parts layer-by-layer with engineering-grade thermoplastics. Ideal for functional parts, including prototypes, low-volume production, manufacturing aids, jigs and fixtures.
Advantages
The FDM process uses the same types of raw materials used in the injection molding process. This technology includes use of support material to create create complex parts and assemblies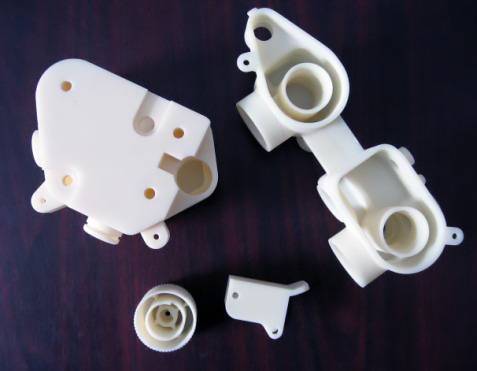
5) DMLS / Metal
Direct Metal Laser Sintering (DMLS) fuses powdered metal and alloy materials to produce metal parts. DMLS produces fully realized metal parts, including tools and end-use parts for a variety of industries.
Advantages
Metal 3D printing, with its advanced metals offering, is best utilized in highly complex and involved design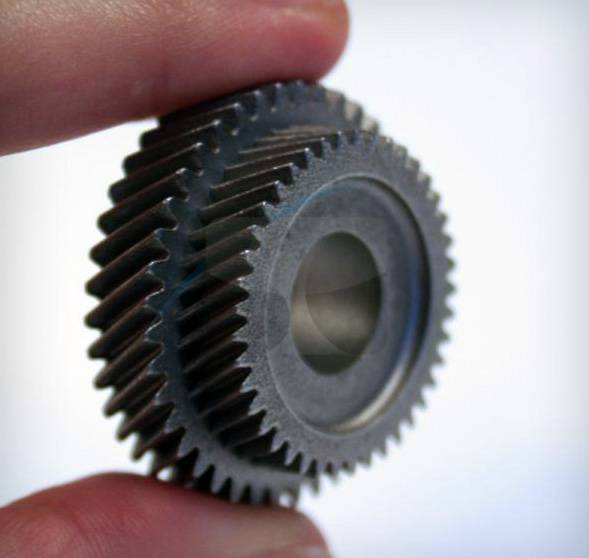
6) LS / SLS
Laser Sintering (LS) (also known as Selective Laser Sintering or SLS) uses a CO2 laser to heat and fuse durable
thermoplastic powder to build versatile parts with high elongation at break.
Advantages
LS production parts and prototypes provide lightweight, heat and chemical resistant solutions. SLS constructs 3D-printed parts from nylon (polyamide), which is strong, tough and durable
Material selection for 3D printing:
3D printed materials are very rich, including transparent, rubbery and biocompatible photopolymers, as well as tough, high performance thermoplastics and more. From fast, inexpensive concept modeling to detailed, super-realistic functional prototyping, through certification testing to agile, low-risk production, our team will help your designers and engineers solve material choice questions and make you design is successful at every stage. the following guides will help you select the perfect material based on a few important factors, like type, minimum thickness, texture and the all-important cost:
NYLON: (Polyamide)
Also called White, strong & flexible / Durable plastic / White plastic
Strong and flexible plastic, 1mm minimum wall thickness, Naturally white, but you can get it colored, About 10 layers per 1mm, Made from powder, Alumide = Polyamide + Aluminum, Interlocking, moving parts possible (chain)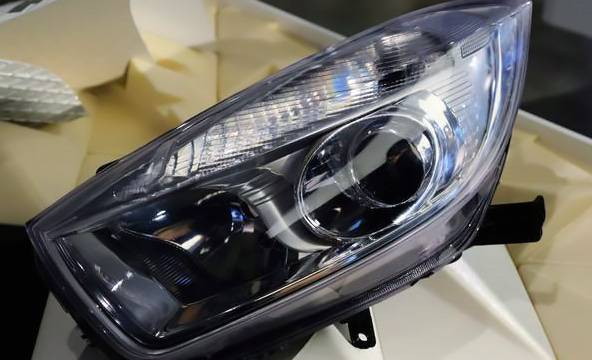
ABS: (Home printers)
Strong plastic like legos are, Made from spaghetti like filament, Many color options, About 3 layers per 1mm, 1mm minimum wall thickness
RESIN: (Multiple options)
Also called White-, Black-, Transparent detail / White detail resin / High detail-, Transparent-, Paintable Resin
Rigid and a bit delicate, Liquid Photopolymer cured with UV light, White, black & transparent most typical colors, About 10 layers per 1mm, 1mm minimum wall thickness
STAINLESS STEEL:
Very strong material
Made with multiple steps or from powder directly, Coloring options like gold and bronze plating, About 6 layers per 1mm
3mm minimum wall thickness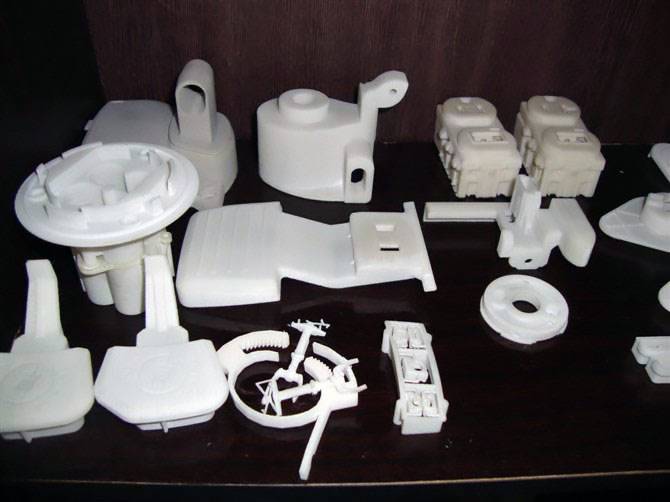
GOLD & SILVER:
Strong materials
Made from wax and then casted, About 10 layers per 1mm, 0.5mm minimum wall thickness
TITANIUM:
Strongest material
Direct metal laser sintering, About 30 layers per 1mm, 0.2mm minimum wall thickness
CERAMIC:
Rigid & delicate
First ceramic is printed then surface is glazed, Ceramic white, glaze typically white, About 6 layers per 1mm, 3mm minimum wall thickness
GYPSUM:
Also called Sandstone / Rainbow ceramics / Multicolor
Rigid & delicateMade from powder, Naturally white, but you can get it with colors, About 10 layers per 1mm, 2mm minimum wall thickness
While prototyping can seem like an unnecessary delay, creating basic prototypes before mass manufacturing processes can save money in the long run. Here’s why.
Find and rectify issues before your customers experience them. If you’re designing an iPhone battery case, you might find out the battery size makes the phone unsteady when placed onto a surface. That wouldn’t be obvious if you didn’t make a prototype first.
Help with market research. Give a prototype to your target audience and gather feedback before you invest more time and money in production.
Reduce business risk. Avoid spending thousands of dollars on a product you don’t know sells or works. Get photos of a prototype before it’s available for sale and run a presale to analyze demand.
Secure investment. If you need funding for your small business, potential investors will look at a prototype to see whether your product or business is worth investing in. It’s more tangible than just a business plan.
A prototype is a preview or early sample of a product or idea you plan to invest in and eventually reproduce in large quantities. Whenever there is a new investment opportunity, before jumping to mass production and risking any capital, you’ll first need to find a way to communicate your idea to possible investors in an understandable, and many times, tangible way.
Prototypes form part of almost any industry you can think of, and they often set the ground for product testing and concept design validation. Architects, designers, engineers, filmmakers, app developers, and so many more, rely on prototypes to simulate their products and attract investors.
Ultimately, at its core, we can define it as a rapid replica of an original product or idea that can be used as a tool to gain financing investment, enhance your crowdfunding campaign, or simply set the start of the design process. Once created, they can be refined or modified to improve function or accommodate the audience’s demands.
The purpose of a prototype
As we define what a prototype model is, we can consider its main purpose to be providing a real, working sample that can be tested and evaluated for errors and efficacy, unlike a theoretical idea. A prototype model aids designers when it comes to the visualization and manufacturing of the real product.
What is typically included in a product prototype?
As a crucial part of the early investment process, prototype models oftentimes include the key aspects and features of the original idea. Given they’re often a precursor of the manufacturing process, they can oftentimes include the product’s specific color, packaging, online visuals, or navigational elements if it happens to be a website or application for example.
The key is to include anything that helps a business or potential investors make a decision. This is why it is important to devote the appropriate time and effort to make it a workable and reliable sample. If it fails to deliver, it will also testify of the original product’s abilities.
Prototypes can be quick and rough. A prototype is not usually intended to look like the final version. As long as it can be used in the early product evaluation and beginning of the design process, it doesn’t need to be perfect.
Numerous businesses have already leveraged the power of 3D printing to transform their product development process. One such example is Adidas. The renowned sportswear company used 3D printing technology to create their Futurecraft 4D shoes. By 3D printing the midsoles of the shoes, Adidas was able to customize the fit and cushioning for each individual wearer. This level of personalization would not have been possible with traditional manufacturing methods. The Futurecraft 4D shoes quickly gained popularity, highlighting the market demand for customized products. Adidas now has a whole line of mass produced running shoes with lightweight 3D printed insoles on the Carbon3D system.
Another fascinating case study is that of Local Motors, an American automotive company. Local Motors utilized 3D printing to produce the Strati, the world’s first 3D printed car. By 3D printing the car’s body and chassis, Local Motors was able to drastically reduce the manufacturing time and costs associated with traditional car production. This innovative approach to manufacturing is not only cost-effective but also environmentally friendly, as it eliminates the need for extensive material waste.
The process of turning a prototype into a final product using 3D printing involves several steps. It begins with the creation of a digital design using computer-aided design (CAD) software. This design is then converted into a file format that is compatible with 3D printing technology, such as STL or OBJ. The file is then sent to a 3D printer, which uses additive manufacturing techniques to build the product layer by layer.
During the printing process, the 3D printer deposits material, often plastic or resin, in precise locations based on the digital design. As each layer is added, the product gradually takes shape. Once the printing is complete, any support structures that were used during the printing process are removed, and the product is ready for post-processing. This may involve sanding, polishing, or painting to achieve the desired finish.
Before learning how to make a prototype, let us teach you what it is. To put it simply, a prototype is an early model of your product. Whether you are creating something brand new or improving an existing one, you’re going to need it.
The purpose of a prototype is to have a tangible product with the actual features developed during design. It brings your solutions from theory to practice. First, you’ll be testing the hypothesis of whether your product can actually be made, and second, it’ll be essential for improvement. Finally, you can learn from it, see how it performs, and perfect it until you get to your final version.
You’re almost convinced to learn how to make a prototype but need a little more? Prototyping is one of the main steps in creating a product, and it’s not a coincidence. There’s a reason that it has become a standard and even a mandatory process. It has proved itself to be effective and efficient. If you’re still debating whether to make one or not, here are some advantages to help you decide.
– It allows you to test and improve your invention
Having your prototype example in your hand will help you really see its flaws and find the best solutions to them. Then, you will be able to put it to use and see if it lives up to your vision. Little by little, you’ll perfect it and reach your final version.
– It motivates you to keep going
After thorough planning and designing, having your idea in your hands will remind you why you started it all in the first place. Reaching that milestone will excite you and motivate you to aspire for your final version and starting production.
– You’ll have something to show
Whether you’re looking for investment or getting a patent, having a prototype will give you a big boost and credibility. You’ll be able to showcase your product and prove its usefulness. In addition, it’ll be easier to sell your idea when you have something to show.
– It helps you understand the user experience
Getting feedback on a real product is easier than on an intangible idea. You’ll be able to learn about what your users really think about the physical features, as well as its usability and possible improvements.
Maybe you see the importance of not jumping into production without first having tested a product prototype, it’s time to learn how to make one. As you might imagine, this is a time-consuming but essential process, it’s not to be overlooked. These six steps will ensure you do a thorough job.
1. Start With a Product Vision
First comes the idea. You have to start somewhere. If you’re not inspired, don’t worry. Most product development doesn’t start with a lightning bolt. It’s best to begin by researching the market and competition. Brainstorming with your team is also a great way to generate ideas. But most of all, your idea should fill an unserved niche or respond to a problem that customers face.
2. Create a Sketch or Use Computer Aided Design (CAD)
Now that you have the idea, you need to get it down on paper. This can be done as a simple sketch, but more common is the use of software such as CAD, which stands for computer-aided design. It can create a 3-D replica of your product idea. That includes dimensions but also shows the product in a virtual simulation, helping you refine the product.
3. Make a Proof of Concept
Once you’ve sketched the idea, you need to create a proof of concept. That’ll show that the product can be developed and how it’ll be developed. It can also be when you test the product and explore its feasibility in a real-world scenario.
4. Make a Physical Product Prototype
Once you’ve done the due diligence and have shown that the product is viable, you’ll want to build a physical product prototype. This should be very close if not exactly like the final product that you’ll market. To do this there are a couple of common approaches. One is 3-D printing, which has become more standard and can even be used in mass production. It’s cost-effective but tends to be fragile and as yet lacks functionality. The other is CNC prototyping, which is a machine that allows for almost perfect, functional copies of a product. However, they’re expensive to install, learn to operate and maintain. A third option would be virtually simulated prototypes, but this doesn’t fit all needs.
5. Test the Prototype
Now that you have a product that you can hold in your hands you have to make sure it does what you created it to do. To validate the design decisions before mass production, you want to have real users try the product and identify issues that might arise. This way changes can be made to build a final product that meets users’ needs and expectations.
6. Create a Production-Ready Prototype
Finally, once you’re certain the product prototype is ready and all the bugs have been worked out, build a production-ready prototype that fits your budget. Figure out the materials and check with reliable vendors to determine costs. At this stage, it’s advisable to create a product roadmap to keep track of any future improvements made to your product.
The initial stages in the innovation process can be seen as leading towards the first pilot project, and during these initial stages prototyping is critical.
So, actually what is prototyping?
Let’s get back to the roots. Latin. The word prototype comes from the Latin words proto (original) and typus (model).
Prototyping seems like a simple concept until you try and define it or its fast moving friend – “rapid” prototyping. Well for a start, it’s not a pilot. That’s a good start, but this constantly expanding buzzword can lead the uninformed eye to see prototyping as everything between brainstorming and scaling when developing a solution using the process of innovation.
A prototype is an early sample, model, or release of a product built to test a concept or process or to act as a thing to be replicated or learned from.
That actually sounds pretty good. With a little bit of tweaking, Wikipedia could be on to something. How about:
A prototype is an early sample, model, or release of a product or system built to test a concept or assumption or to act as a thing to be tested and learned from.
In this sense an initial “prototype” is the first complete solution to the original challenge. The first “prototype” is the first time all parts of a solution are tested together. It is the first time that the inter-dependencies of all components can be tested, analyzed, and refined. Complete does not and should not mean final.
In conclusion, choosing the right prototyping company is crucial for the success of your product development project. Consider factors such as expertise and experience, range of services, communication and collaboration, as well as quality and timeliness when making your decision. By carefully evaluating these factors, you can select a prototyping company that will effectively bring your ideas to life.
In today’s fast-paced world, prototyping has become an essential step in product development. It allows companies to test and refine their ideas before investing in mass production. However, not all prototyping companies are created equal. To ensure the success of your project, it is crucial to choose the right prototyping company.
Expertise and Experience
When evaluating prototyping companies, one of the most important factors to consider is their expertise and experience. Look for a company that specializes in your industry or has experience working on similar projects. This ensures that they have a thorough understanding of your specific requirements and can provide valuable insights throughout the prototyping process.
Additionally, consider the company’s track record and portfolio. Look for evidence of successful projects they have completed in the past. This will give you confidence in their ability to deliver high-quality prototypes.
Range of Services
Another factor to consider is the range of services offered by the prototyping company. Different projects may require different types of prototypes – from basic mock-ups to functional prototypes – so it is crucial to choose a company that can meet your specific needs.
Ideally, look for a company that offers a comprehensive range of services, including 3D printing, CNC machining, injection molding, and more. This ensures that they have the necessary capabilities to produce prototypes using various materials and technologies.
Communication and Collaboration
Effective communication is key when working with a prototyping company. You want to choose a company that values clear and transparent communication throughout the entire process.
Consider how responsive they are during initial consultations or inquiries. Do they take the time to understand your requirements? Are they willing to provide regular progress updates? A good prototyping company should be proactive in keeping you informed about any challenges or changes during the project.
Collaboration is also important. Look for a company that encourages collaboration and values your input. They should be open to suggestions and willing to incorporate your feedback into the prototyping process.
Quality and Timeliness
Lastly, consider the quality and timeliness of the prototypes produced by the company. The purpose of prototyping is to test and refine your ideas, so it is crucial that the prototypes accurately represent your vision.
Ask for samples or examples of their previous work to assess the quality of their prototypes. Look for attention to detail, precision, and durability.
Timeliness is also important. Discuss project timelines with the prototyping company and ensure that they can deliver within your desired timeframe. Delays in prototyping can have a significant impact on product development schedules, so it is essential to choose a company that can meet your deadlines.
Why does prototyping matter?
The goal of a prototype is to ensure your design works in the hands of the user, Getting feedback on a prototype is one of the easiest and cheapest ways to get feedback, before you spend a lot of money building something that might not meet user needs. Then you’d have to spend even more to course-correct.
Creating a prototype allows design teams to hone a product concept before it’s built and launched—saving time, money, and headaches for everyone involved. Prototyping helps designers at every step of the design process, in three specific ways.
1. Validate early concepts
In a design sprint, you can bring your concept to life with a rapid prototype. This helps stakeholders align on what’s being designed, giving everyone a realistic depiction of what the experience will be.
2. Facilitate communication
Whether you’re working with clients or talking with your CEO about goals and needs, you’ve probably noticed that designers and non-designers often speak different languages. we should have commenting features to share perspectives and feedback, so that everyone’s on the same page—and nothing is lost in translation.
3. Refine features and flows
When you’ve designed something from the ground up, it becomes hard to see it with a fresh eye. No matter how much research you’ve incorporated into your initial design, rote data can’t replace user testing with a prototype. This will expose UX challenges that weren’t obvious during planning, and enable quick and easy changes to UI.
Rapid prototyping is a general term for a range of manufacturing processes that uses technology to create physical models quickly and cost-effectively. Engineers, designers, and manufacturers often use this process for prototyping new products or testing design modifications.
Rapid prototyping utilizes a digital CAD software (Computer Aided Design) design to allow for faster turnaround time between when changes are made to a design and final printing. 3D printing technology is then used to create the prototype.
It’s important to note that rapid prototyping is not the same as 3D printing. Rapid Prototyping is a broader term that involves creating prototypes using various manufacturing processes like CNC machining. 3D printing is one of the manufacturing processes used for rapid prototyping.